Home     About     DIY     Recipes     InStitches    Contact
Showing posts with label guest post. Show all posts

19.9.12

Guest post: How To Read A Book

BY ENGLISH FROM BEFRECKLED

What an honor!  Being asked to guest write for Talia is such a momentous occasion in my blogging career, I probably spilt coffee all over my computer.  Again.

My name is English, and I write over on Be Freckled.  It's a tiny site full of words and photos, hence my guest post; today, I will be teaching you how to read a book.  I know you're all thinking, "why, I learned to read ages ago!  Who does this lady think she is?!"  I promise you, I have tons of helpful tips that no one has bothered to share with you.  As a matter of fact, they could mean the difference between safe reading techniques and haphazard novel enjoyment resulting in injury.  So, for your own safety, I will begin without further ado:
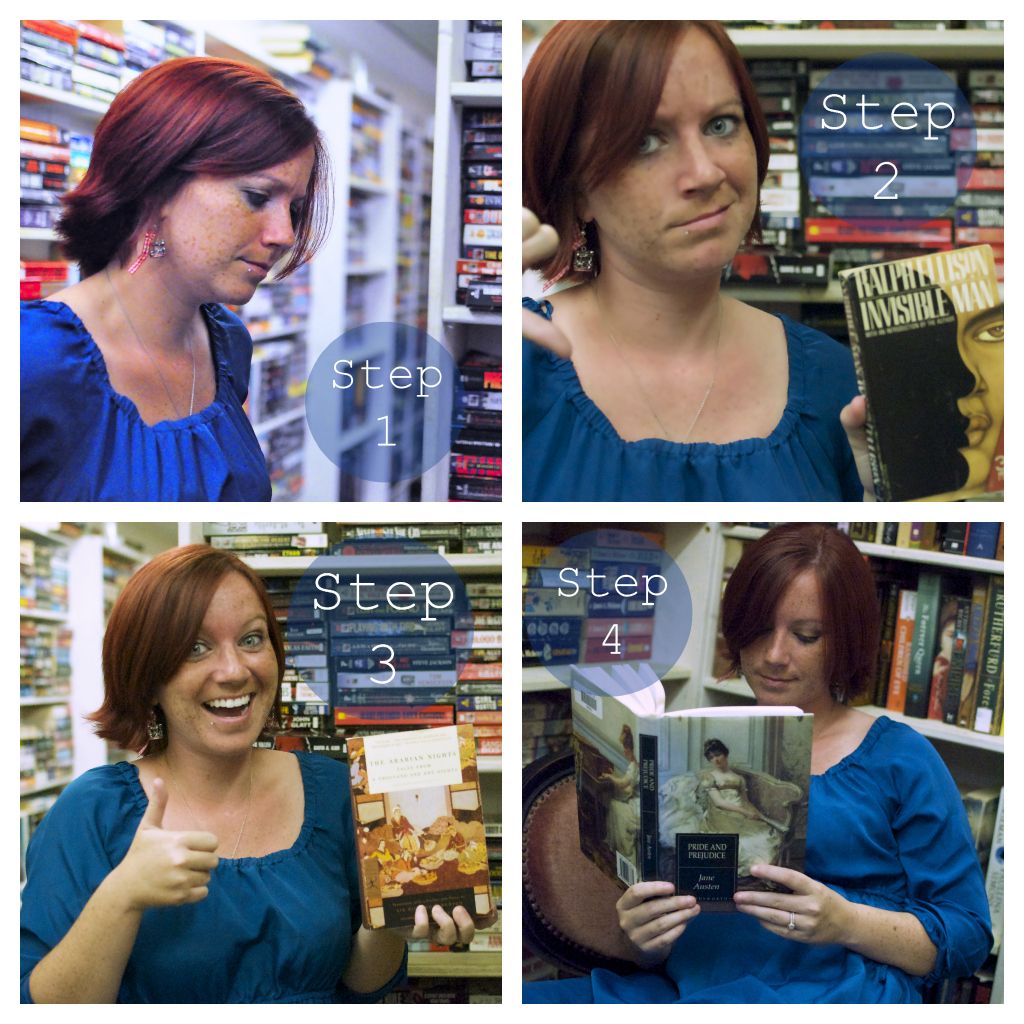
Step One: Wander into a local bookstore and begin pondering life altering novels to devour.  One must take very careful precautions when choosing the correct novel, however.  Please see Step Two for details.

Step Two: Instantly judge possible candidates based on cover detail.  Invisible Man?  Boring cover.  Veto and move on.

Step Three: Repeat Step Two until a likely novel comes within eyesight.  Arabian Nights?  Much better.  Eventually narrow down choices until winner emerges.  In this case, it was Pride & Prejudice.

[Optional Step Three point Five: If you must, read inside jacket or back of book to get an idea of what type of novel you will be reading.  Only use this step if judging the front cover is not enough to convince you of novel's awesomeness.]

Step Four: Find seating arrangement on which to inhale descriptive phrases from.  Vintage European settee?  Yes, thank you.
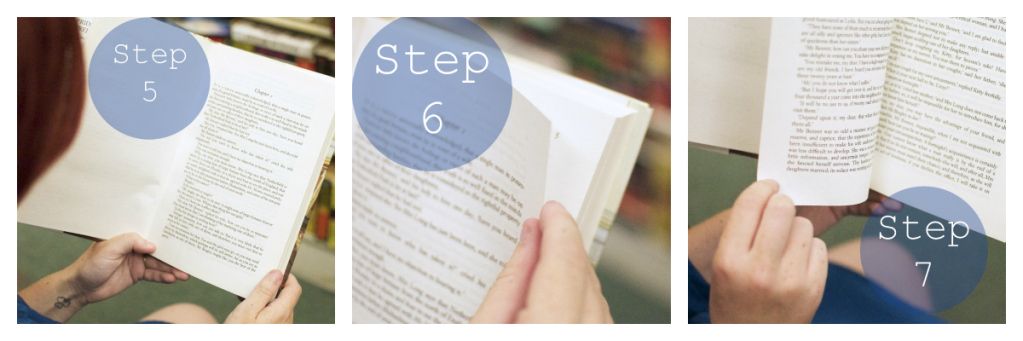
Step Five: Open cover, begin to read first page.  Contrary to popular belief, or contrary to Asian practices, one must interpret novel by starting at the first sentence at the top of the page, beginning on the far left hand side and proceeding to the right.  Once you've reached the last word in the first line, begin at the far left of the second line, and continue thus.  Confusing, I know, but I have confidence you will be able to conquer this literary madness.

Step Six: Prepare to turn page.  There are many techniques for turning pages, but a tried and true method is to use scientific equations to defeat gravity while performing acrobatic stunts during which you play trumpets.  For beginners, however, simply lift a corner of the page by any means necessary [finger, thumb, spatula, etc.], and lift page.  CAUTION!  Hurried page turning can result in disastrous consequences!  See Exhibit A for details.

Step Seven: Continue turning page until back is revealed, and continue reading.
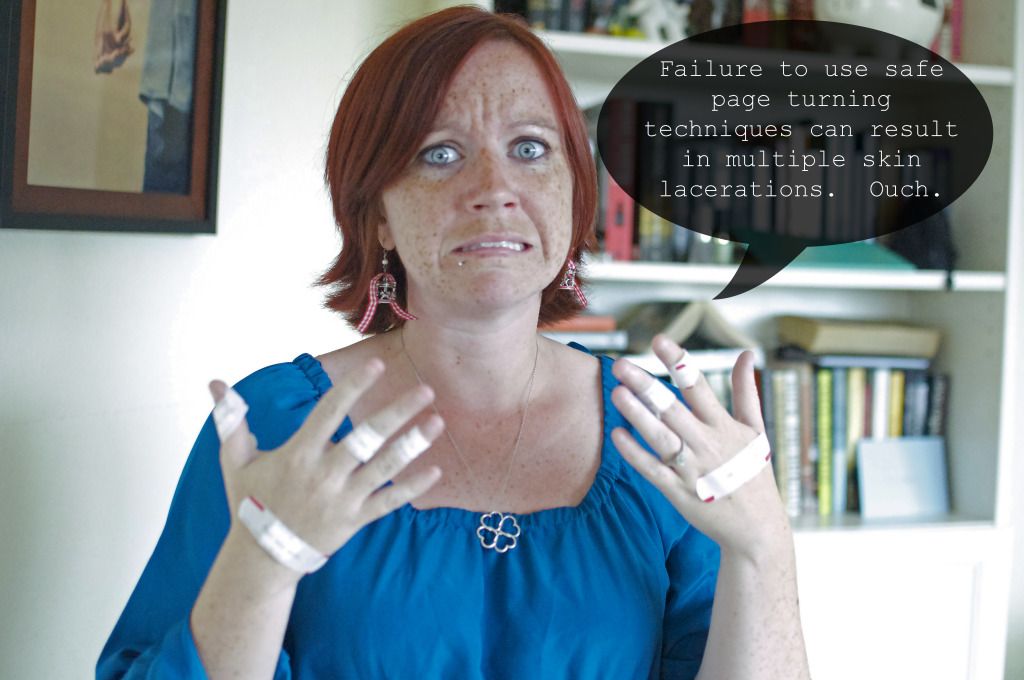
Exhibit A: I unfortunately lacked concern for my own safety, and was rewarded thus.  Damn you, paper cuts!

Step Eight: Repeat steps Two through Seven until novel is completed and knowledge is gained.  Breaks may be necessary until you gain the stamina and/or time needed to complete a novel in one go.

Please let me know if the steps above make your literary experience more enjoyable!  **Note: I never judge a book on the cover, and positively enjoyed Invisible Man.  No fingers were harmed in the making of this tutorial.**

------------------------------

Thank you so much for sharing with us, English! I've known this girl for ages, since we were kids! I was around maybe 8 when we met I think...? It kinda blows my mind actually. She's one of a very small handful of people that I've known for a very very long time. English writes on her personal blog over at Be Freckled. Be Freckled is full of her thoughtful daily musings, pics of her cute pups, and (my favorite) her book reviews! Go on and check out Be Freckled and show her some love. xo

1.6.12

Blog Party Guest Post: The Beetle Shack

DIY: Fabulously Fruity Dangling Succulent Garden
(ie. a terrarium)


It feels like an eternity that these little glass baubles have been ethereally floating above our dining room table, sometimes filled with candles, other times with flowers. Always hanging by fishing line and little white thumbtacks pushed into the ceiling.

In this incarnation, they are suspended by fluro pink string and stuffed full of plants and soil.

I thought you might like to make some too, so here's how it's done.

You will need

* A collection of glass vessels.
(I'm using some candle holders that you can see hanging from my ceiling back here. I've actually seen some in hot dollar and other junk shops quite recently.)
* Very small stones. They can be bought from your local nursery or pet store.
* Some moss. I collected mine from our outdoor pavers that don't catch much sun.
* Potting mix
* Succulent plants 

Steps

1. Add a layer of small pebbles to the bottom of your container. Make sure you rinse them first. I've used black here but i'm dreaming of making more with fluro pebbles, you know, like the ones you put in the fish tank? Imagine the glory!


2. Add a layer of Moss on top. This prevents the soil in your terrarium from escaping through pebbles.  If you don't have any moss handy, a very fine screen will work well here. Personally, I think the moss is really pretty.


3. Add soil. I used a long handles tea spoon to make navigating the small space a little easier. 


4. Add the plants. Take a little time and consideration to make sure it looks pretty.


TA DAAHHHHH


I couldn't resit making a few more (in fact I filled every empty glass vessel within reach)

now all you need to do is add fruity string in the colour of your choice, find a thumb tack, climb atop your table and you're done.


-Emily

--------------

Thanks for sharing, Em! Emily blogs over at The Beetle Shack. It's one of my faves. She is hilarious, honest, and just SO COOL! If we ever hang out in real life, it will be mayhem. Glorious mayhem.

Check out her blog and send her some love! xo Talia

30.5.12

Blog Party Guest Post: Dee Rolston

DIY: Pretty Decorated Bowl


Hello lovely Talia Christine readers, my name is Dee and I blog over at dee*construction.

I am so honoured to be a guest blogger over here this week – I originally found Talia’s blog through a comment she’d made on A Beautiful Mess about living in NZ and was delighted to find out we lived in the same city, and actually knew some of the same people! Since then, we’ve hung out a bit and my 4yo has developed a bit of a crush on Audrey (but, seriously, how could you not??)

Two loves I have are natural materials and vintage needlework and today I want to show you how I combined the two as a simple and sweet wall decoration.


You will need:
Vintage embroidery or applique
Wooden bowl (these are quite common finds in op shops here)
Mod Podge & paint brush
Scissors


If you are using a vintage applique, simply trim it with your scissors as close as possible to the applique.


Then apply the Mod Podge to the reverse side and glue it to the wooden bowl.
Done!


If you are using a vintage embroidery, more care needs to be taken not to ruin the meticulous hand stitching. It’s difficult to see from the photo, but on the reverse side I applied Mod Podge all the way around the edge of the embroidery where I intended to trim it. This way, if I accidentally cut too close and snipped some thread, it wouldn’t come undone.


 Once it had dried, I trimmed the part I wanted as close to the embroidery as I could.


Once I had cut it out, I went around the edges of the embroidery with one of the kids’ brown pencil crayons so that the remaining white fabric wouldn’t be so obvious.

Also, for this bowl I drew some hexagons in the background with a white pen to add interest to the background.


Then I applied the Mod Podge generously over the reverse side of the embroidery and glued it to the bowl as I did with the appliqued one.

(On this bowl I also Mod Podged the entire front of the bowl too because I had sanded the original varnish off)


I hope you liked this little idea and can find some time to give it a try.

Congratulations on 4 years of blogging Talia!
Dee X

------------

Um, guys, Dee is seriously so brilliant! I LOVE this DIY! I can't wait to try this out for myself.

Dee blogs over at Dee*Construction about her craftiness, pretty dolls, and her beautiful (SERIOUSLY beautiful) family. I'm lucky enough to know Dee personally. She's just amazing. She's a great mom and a good friend. One time, when Audrey had the measles, she dropped a meal off for us because having a sick kid is rough. She just had a baby too. I should have been the one bringing HER a meal. She is always an inspiration.

Pop on over to her blog and give her some love! xo Talia

29.5.12

Blog Party Guest Post: Naomi Anselmo

On being far away

When my husband and I got married almost five years ago, we felt like such adults. We moved into our first apartment. We got a dog. Eventually we bought a house with seven rose bushes in the backyard.

Two and a half years later, for various reasons, we decided we needed to move away. Far away. Not as far as Talia, but a thousand miles. A thousand miles from our family and friends. From everything we'd been raised with, every familiar building and road, every favorite cafe and local band.

We moved a thousand miles away from everything and everyone who had raised us. And we didn't realize until that point how much our families and friends really played into how we built our household. Suddenly, it was all up to us. Sure, we still skype and talk on the phone and email and get occasional visits from our family. But in a really heavy sense, we're in this on our own.

Photobucket
Photobucket
Photobucket
Photobucket 
We've built a new family on our own. We're figuring out what kind of parents we want to be, without the benefit of having our parents on our doorstep a half hour after we call them for advice. We've stocked our pantries, tended our garden, chosen favorite nursery rhymes, had new babies, figured out chore schedules on our own. Gone (for now) are the days of calling my mother over to show me how to make baguettes. Or of my father-in-law stopping in after work to take a look at the broken washer.  Family restaurant dates and discussions of the stages of childhood just aren't within our grasp right now.

We both long to live close to our families again someday. But in the meantime, it really has been sweet knowing that we can survive away from the most influential people in our lives - just as they learned to do decades before us. We're truly following in their footsteps. We're building a distinct family and taking charge of it - and every little new tradition we start is a reminder of that. Every new Christmas cookie recipe, every family car ride game, every weed pulled from the lettuce patch. We're doing just what they taught us to do. It's sort of like we're not really too far from them after all.

-----------------------

Thank you for sharing this beautiful post with us, Naomi! This hits home for me in particular being so far away from my family. But we're also really blessed to have Phil's family close by.

Naomi has the prettiest blog over at ofanselm.com. She blogs honestly about her life with kiddos and takes the prettiest pictures. I want to take pictures like her one day. I think she's the bee's knees. And we're also pen pals. Which I think is really really cool. xo Talia