
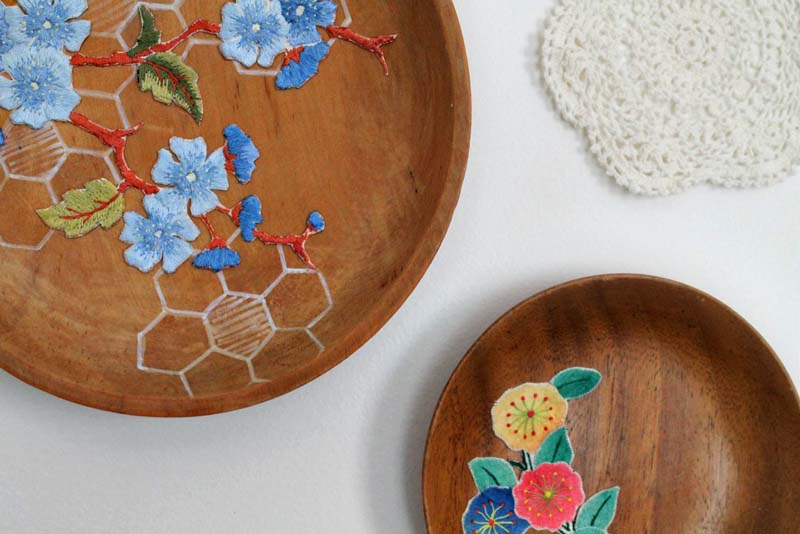
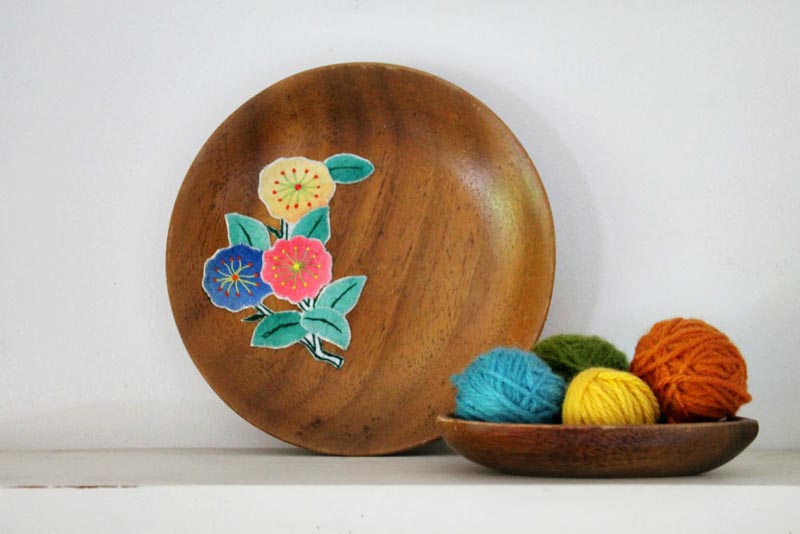
DIY: Pretty Decorated Bowl
Hello lovely Talia Christine readers, my name is Dee and I blog over at dee*construction.
I am so honoured to be a guest blogger over here this week – I originally found Talia’s blog through a comment she’d made on A Beautiful Mess about living in NZ and was delighted to find out we lived in the same city, and actually knew some of the same people! Since then, we’ve hung out a bit and my 4yo has developed a bit of a crush on Audrey (but, seriously, how could you not??)
Two loves I have are natural materials and vintage needlework and today I want to show you how I combined the two as a simple and sweet wall decoration.
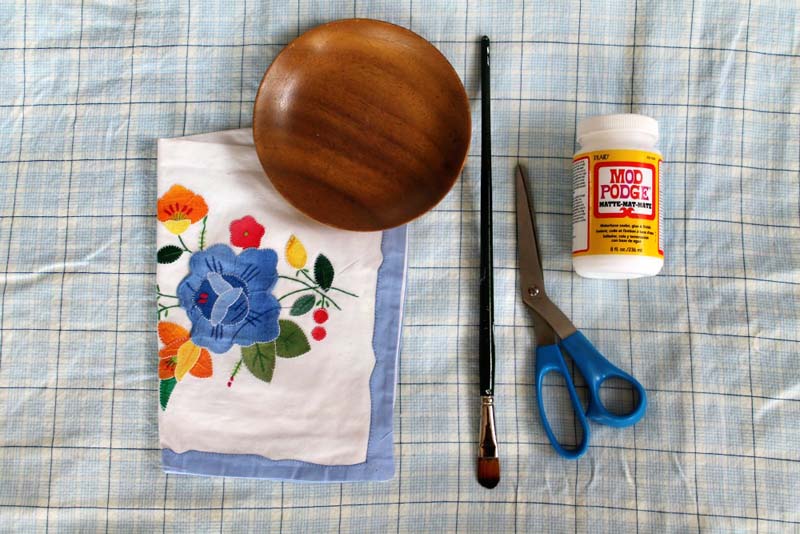
You will need:
Vintage embroidery or applique
Wooden bowl (these are quite common finds in op shops here)
Mod Podge & paint brush
Scissors
If you are using a vintage applique, simply trim it with your scissors as close as possible to the applique.
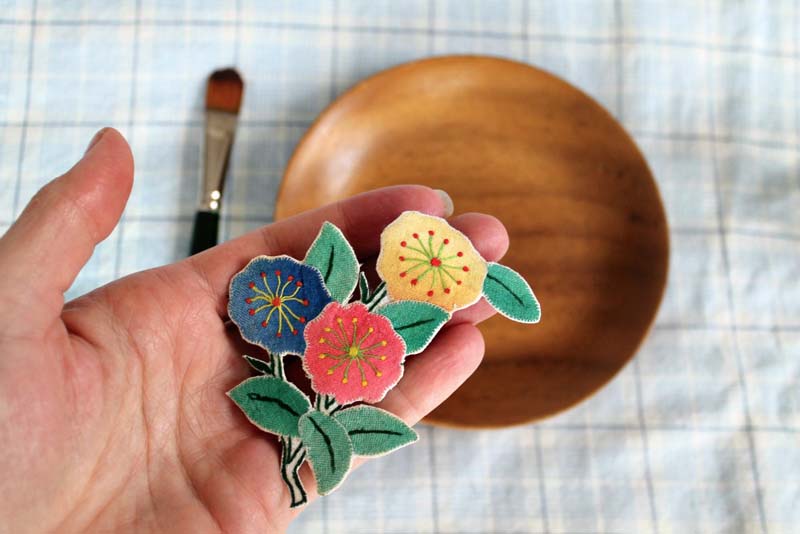
Then apply the Mod Podge to the reverse side and glue it to the wooden bowl.
Done!
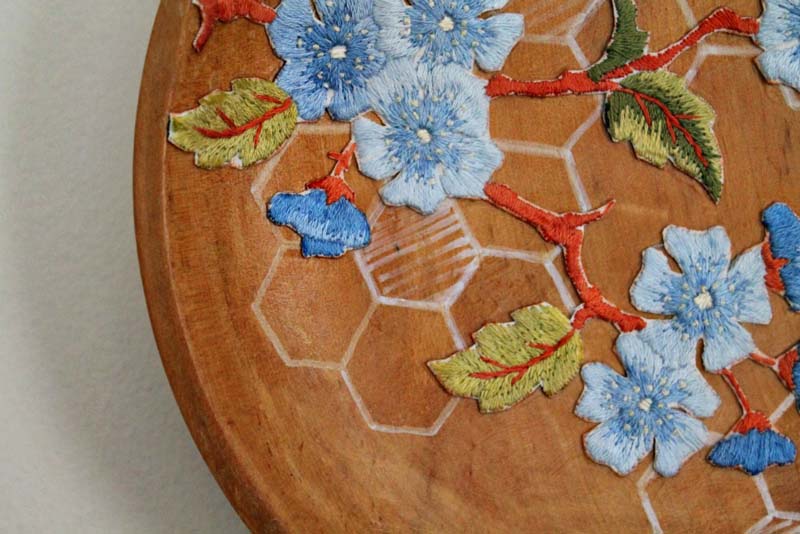
If you are using a vintage embroidery, more care needs to be taken not to ruin the meticulous hand stitching. It’s difficult to see from the photo, but on the reverse side I applied Mod Podge all the way around the edge of the embroidery where I intended to trim it. This way, if I accidentally cut too close and snipped some thread, it wouldn’t come undone.
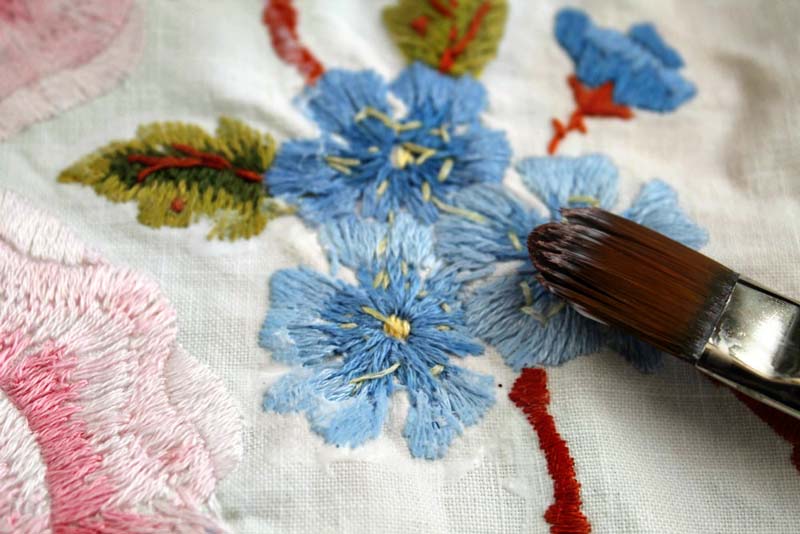
Once it had dried, I trimmed the part I wanted as close to the embroidery as I could.
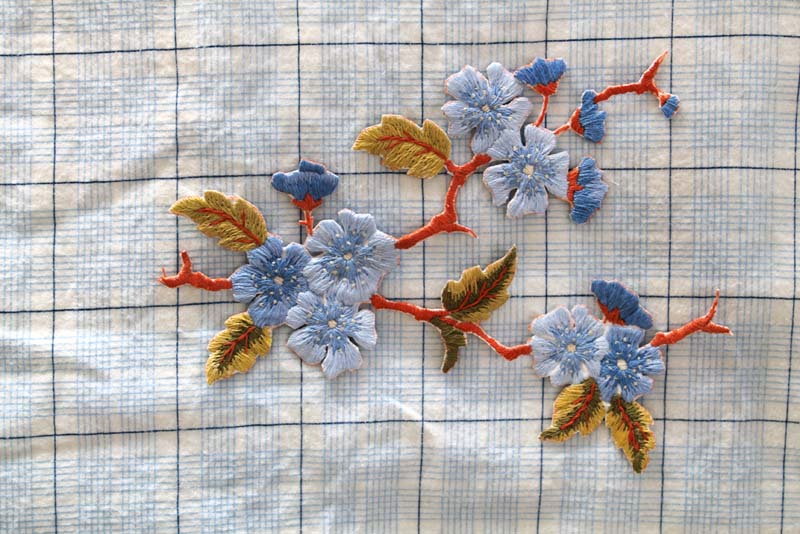
Once I had cut it out, I went around the edges of the embroidery with one of the kids’ brown pencil crayons so that the remaining white fabric wouldn’t be so obvious.
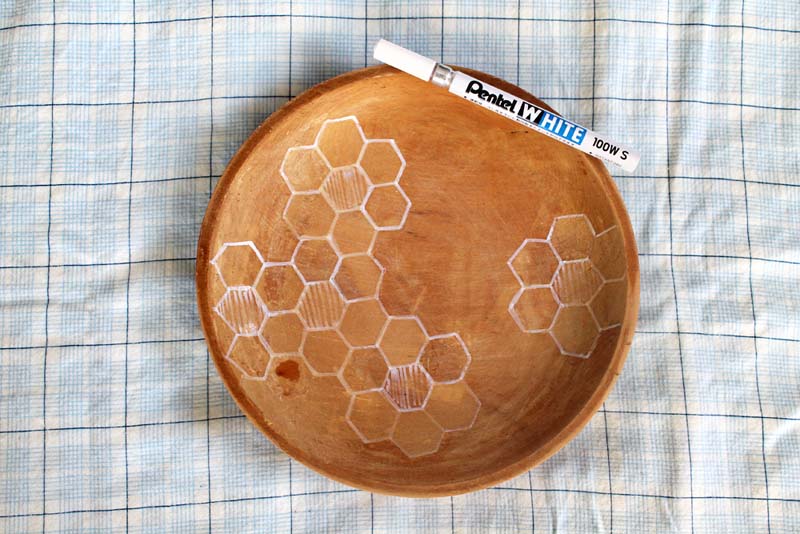
Also, for this bowl I drew some hexagons in the background with a white pen to add interest to the background.
Then I applied the Mod Podge generously over the reverse side of the embroidery and glued it to the bowl as I did with the appliqued one.
(On this bowl I also Mod Podged the entire front of the bowl too because I had sanded the original varnish off)

I hope you liked this little idea and can find some time to give it a try.
Congratulations on 4 years of blogging Talia!
Dee X
------------
Um, guys, Dee is seriously so brilliant! I LOVE this DIY! I can't wait to try this out for myself.
Dee blogs over at Dee*Construction about her craftiness, pretty dolls, and her beautiful (SERIOUSLY beautiful) family. I'm lucky enough to know Dee personally. She's just amazing. She's a great mom and a good friend. One time, when Audrey had the measles, she dropped a meal off for us because having a sick kid is rough. She just had a baby too. I should have been the one bringing HER a meal. She is always an inspiration.
Pop on over to her blog and give her some love! xo Talia
The links at the bottom of the post aren't working.
ReplyDeleteThanks for that! They've been fixed now :)
DeleteThis is amazing! Dee is so clever and super lovely too!
ReplyDeleteGreat idea, stunning result. Dee always has such fantastic ideas. She's a beautiful person too. Cx
ReplyDeleteGah! too cute!
ReplyDeleteWow!! This is a beautiful DIY :-D
ReplyDeleteWow!! This is a beautiful DIY :-D
ReplyDeleteWow!! This is a beautiful DIY :-D
ReplyDeleteThis is great, shame Dee's blog isn't accessible :(
ReplyDelete